Blogger isn't always the most intuitive platform to navigate - but it is free and simple to use and manage.
To help you find information quickly on this blog, you can
- use the search bar using key words e.g. Asiair mini
- use the blog menu list by date
- use this page which will be regularly updated https://undersouthwestskies.blogspot.com/2025/12/want-to-find-something-quickly-on-my.html
- visit my home page https://undersouthwestskies.blogspot.com/p/welcome-to-my-astronomy-and.html
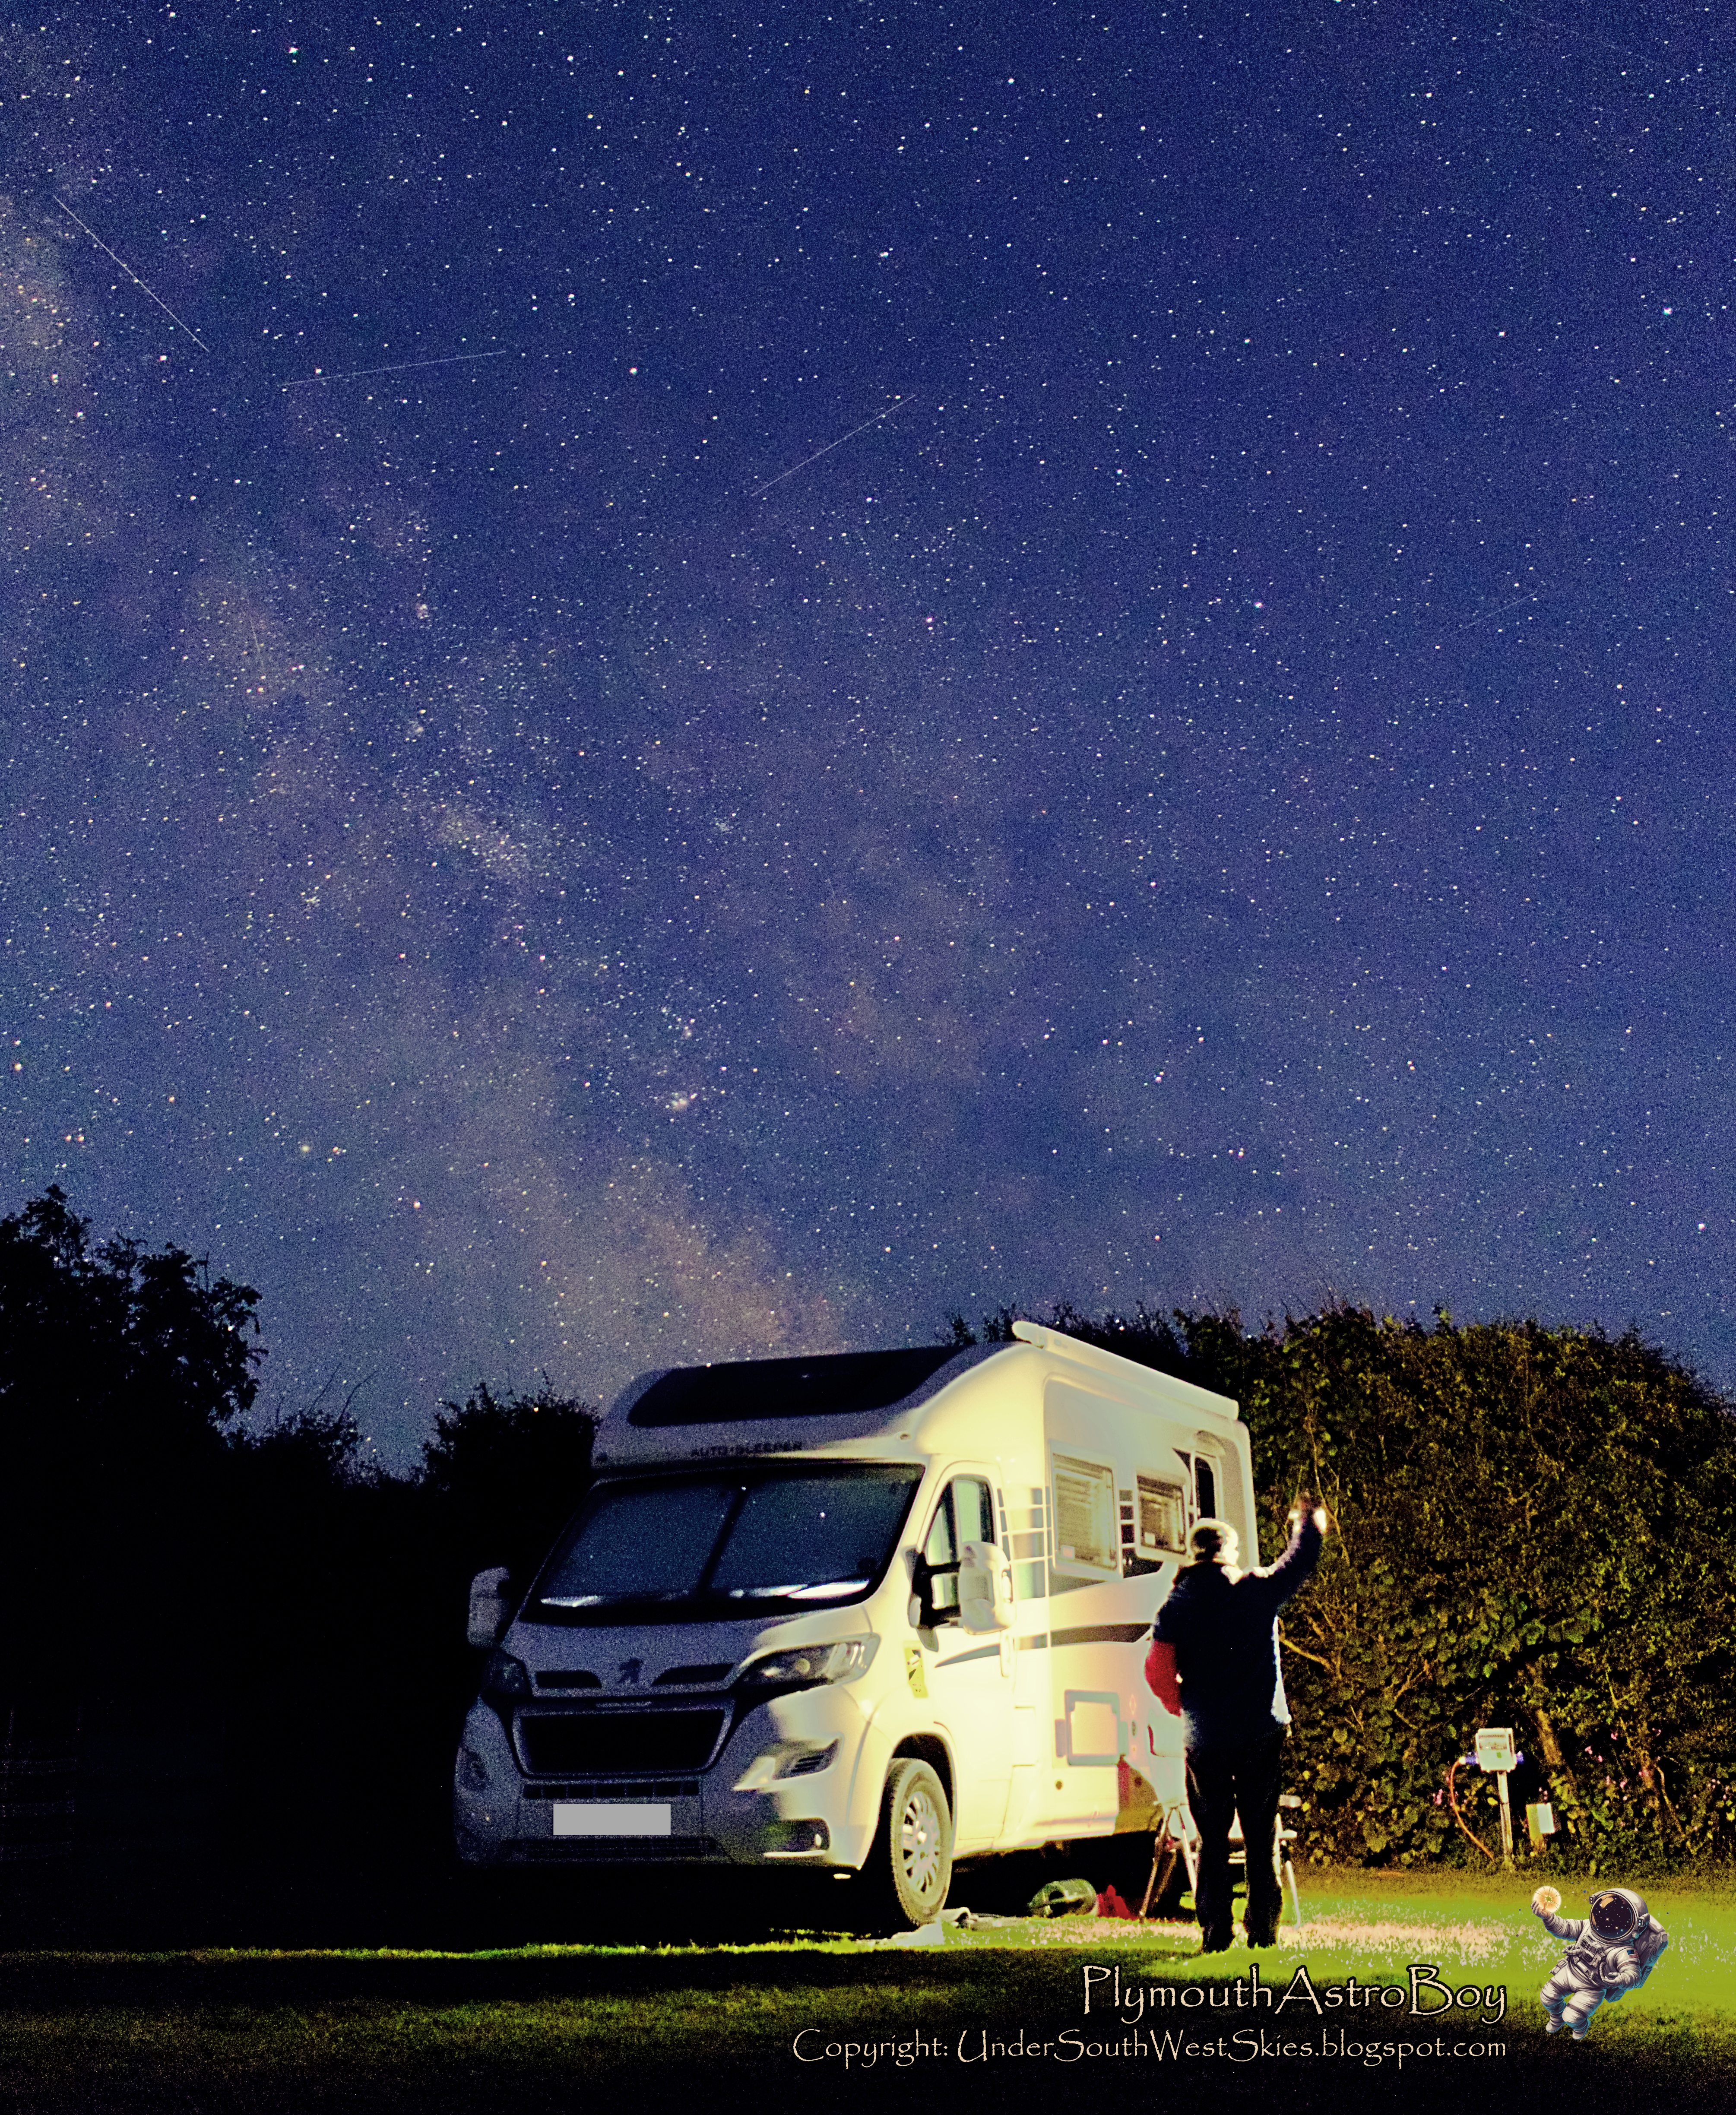
How to take your first milky way ‘selfie’
An aim for this year; to get a decent milky way selfie!
Below are the selfies I took last year. All
of them can be significantly improved upon.
So, what have I been doing? What do I need to do to raise my
game further this year?
This is post 6 in my blog series ‘Beginner’s guide to
taking your first milky way photograph’ – a series in which I share my
learning journey thus far towards this aim. As always, please remember I am
writing as a complete beginner to astrophotography and the sole rationale for
my entire blog is one of helping beginners (like me) make some rapid ‘basic skills’
progress in their astronomy and astrophotography knowledge.

What equipment do I use to obtain a milky way selfie?
·
Canon 800D DSLR
·
Samyang 14mm f/2.8 or Canon 22mm f/2.8 lenses – affordable,
sharpish, wide angle lenses basically
·
Tripod
·
Intervalometer (although I am thinking of
getting a remote shutter release at some stage this year)
Previous posts will give you tips about planning for milky
way photography, additional equipment needs and basic camera and base astro
settings. But, here I will stress a couple of things I discovered last year.
For a good selfie, you need a dark sky location.
Secondly, if you are doing a silhouette composition, you
will need to find a location where you are higher than your camera i.e. you are
shooting upwards slightly so you are silhouetted against the milky way. You can
also use a light source such as a light orb, headtorch or adjustable LED panel
as well.
Your image composition should tell a story - see my previous
post on composition tips. If I am doing a ‘headtorch looking up to milky way
shot’ I shoot in portrait. If I am using an orb to light some of the landscape
around me – I shoot in horizontal.
To get a sharp silhouette or image of myself, I am to make
my self smaller in the frame by either going away some distance from my lens or
by using a very wide-angle lens which will make me look smaller in the frame.
In either case I am trying to be not further than 8 – 12m maximum from my camera.
I found focusing your camera for a selfie shot to be
tricky. I have given tips on focusing at night in a previous post on camera
settings. For now, I’d suggest you either focus on the sky itself (infinity)
and you stand somewhere as close to the hyperfocal distance as you can. Alternatively,
I an focus on myself – I mark where I am going to stand, return to my camera
and then focus on that marker.
Of course, the issue about a selfie is simply this – how long
can you stand still for? How hard is it to stand still during the exposure? If
you are holding a lighting orb? Or when there is a slight chilly wind blowing?
Practice getting a comfortable pose. I found that breathing out very slowly
when taking the exposure helped enormously. Alyn Wallace in one of his videos I
have embedded below recommends a sitting pose if you find standing for any
length of time difficult.
What camera settings do I use?
·
Manual mode
·
RAW
·
Lens focusing – manual
·
No light pollution 1600/3200 ISO; light
pollution then 800/1600
·
Not using star tracker – then shutter speed 10 –
20” depending on 300 rule and lens focal length with aperture f/2.8;
·
Doing two images – tracking and stacking sky –
f/4.0, ISO 800, 30” shutter speed; combined with a blue hour foreground exposure
with me in it, experimenting with shutter speed, aperture and ISO settings
·
I tend to do test shots irrespective of whether
single or tracked or stacked exposures – checking against histogram
How do I take the photo if I am standing in the scene?
You will need a remote shutter release, or an
intervalometer, or use your camera’s internal shutter release timer.
Again, the videos below give plenty of tips but this is how
I do it. I use an intervalometer on which I set a delay – that’s the time
period I have to get into my location and pose. I also have my camera’s 10”
delay setting switched on. This means once I am in position, the 10” delay on
the camera will then kick in – I can see a red flashing light or hear a bleep when
that happens – this is when I firm up my pose! I then mentally count down my exposure time in
my head and then add another 10” on top of that before I finally move out of
pose.

Did this work last year?
Yes…..and no……! So what am I going to do differently this year? Not sure yet is my answer. I will start with what I did last year and then try something different. Rome wasn’t built in a day. I am expecting lots of duff shots but that is part of the fun. I tried single exposures, so maybe try and perfect this a little more and do some stacked/tracked/blended shots this year as well.
If I make any changes to the above approach, I will add a
postscript update below.


In the meantime, if you have any better tips and approaches,
then why not share them in a comment below so that future post readers can
learn from your experiences too
Dark, clear skies, stay safe, enjoy the forthcoming return of
the milky way to our northern skies
Steve


No comments:
Post a Comment
Hello, thanks for visiting us. If you want to drop a comment or get in touch - leave a comment and we will get back to you asap. Bye