Monday, 26 May 2025

My first effort on the NGC 6888 The Crescent Nebula

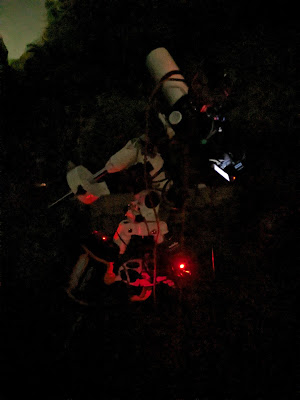
 I am slowly getting to grips with the idiosyncrasies' of the EQM-35-Pro.  Balancing in DEC is straightforward as it moves and rotates easily. Balancing in RA is tricky.  The grease used by Skywatcher is gunky and makes rotation stiff. 

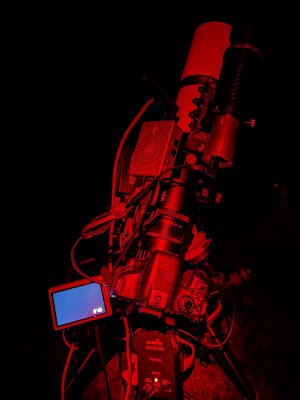
Anyway, here are the acquisition details of my latest effort - NGC 6888 The Crescent Nebula.

equipment: 

Canon 800 D DSLR astro-modded

WO Zenithstar 61ii refractor with field flattener

ASIair mini with ZWO 120mm mini guide cam and RVO 32mm guide scope

Celestron Lithium Pro power bank

EQM-35-Pro

photograph details: 

lights: 60 x 180" at ISO 800

20 each of flats, biases and dark frames


And here are the photos, after post editing in SIRIL, GraXpert and Affinity Photo: 

I never understand how I manage to get a different result on exactly the same data every time I use SIRIL. Baffling! 


and here are two further processed from the originals. If you asked me what I did - I have no idea! 


So, NGC 6888 - around 5000 light years away and discovered by Herschel in the late 1700's.  An emission nebula in the constellation Cygnus, it is formed by fast stellar winds from the Wolf-Rayet star WR 136. 
This stellar wind collides with and energises a slower moving wind ejected by the star when it became a red giant some 400,000 years ago.  The result of this collision is a shell and two shock waves. 

Postscript:

I have done some follow up post editing and here is my final image from this data set:


Tuesday, 20 May 2025

Expectations versus reality in Astrophotography

 I recently read a very interesting short piece about this. Unfortunately, I can't remember where I saw the piece. But I can remember some of the basics and I thought it was very apt for beginners, new to astronomy and astrophotography in particular. 

When I first started my astrophotography journey, I was very smitten with the images I was seeing in magazines and on-line, particularly of galaxies, nebulae and milky way landscapes. Naively, I thought after some photography basic courses, I'd be able to go out and capture such images. But, of course, I now know differently. 

Expectations vs reality!

It isn't just about knowing how to get your DSLR off auto is it? It's all those astrophotography programs - Sequator, SIRIL, Deepskystacker, PixInSight, GraXpert. The list is endless. Each requires significant investment in time - practice, practice, practice. How to stack frames! How to take calibration frames. Tracking the stars! Getting my head around long exposures and the whole host of post editing techniques to capture colour, shape, texture of night sky objects, was such a steep learning curve. How disappointed was I as my first efforts materialised on the rear view screen? Dim, noisy, small and frankly dull. Where was the colour, shape, texture? It took some time to grapple with the histogram and process of stacking multiple images.  

Expectations vs reality! Learning how to use the various programs - so much time on YouTube! 

And what about setting up equipment on the night? How many hours have I spent trying to polar align accurately? Trying to work out the intricacies of ASIair settings? Cable management so that they didn't dangle and snag. Tripping over the tripod; wasting how many frames because of dew on the lens or forgetting to replace batteries in a tracker. So many hard learned lessons and the need for checklists! 

Expectations versus reality! Tough learning moments. 

Nothing prepares you for the amount of time spent researching equipment needs. My first telescope was, on reflection, a bad purchase. The telescope was good but just not appropriate for what I as trying to achieve. Telescopes, camera lenses, filters, dew bands, guide scopes, ASIair mini, guide cams and scopes, power tank supplies, tripod types, trackers. What a minefield! After my first poor purchase, I took it slowly and used forums like stargazing lounge and cloudy nights to seek advice. Astrobin helped me visualise what each telescope and lens could achieve in tandem with a canon dslr. I came to realise that the most important bit was the mount! From Ioptron skytracker, to Skywatcher Star Adventurer 2i pro; and now to an EQM-35-Pro. Payload, tracking accuracy, polar alignment, stability, weight, reliability, ease of maintenance - all have to be considered. 

Expectation vs reality. Doing our research, consulting and seeking advice. It takes so much time. 

Processing. I just didn't understand how much time would be spent on post editing an image. I genuinely thought I'd capture a finished image almost immediately. Foolish boy! Reviewing images to get rid of the poor ones; stacking the remaining ones to get one master image with improved noise to signal ratio. Curves, levels, histogram stretching! A dark art! Noise reduction, colour calibration, deconvolution. So many processes, so many different ways of doing your workflow!  It has taken me time to get my own personal workflow and even now I'm not sure it's right. 

Expectation vs reality. You can edit the exact same data several times and each time get a different visual result. And, you may be like me - none the wiser as to whether its an accurate reflection of what exists in reality. Astrobin becomes your friend! 

I wasn't prepared for the range of emotions I would feel and develop as an astrophotographer. It really is awe and wonder stuff. I was so excited when my first galaxy appeared on the rear view screen; an indistinct fuzzy blob, but a galaxy nonetheless! Light years, the time taken for a photon of light to reach your camera sensor. Time travel - when it left 250,000 light years ago! The image you see on the viewfinder.....one from the past. Is it still there now? How might it have changed? So many questions! The gradual understanding of seasonal skies, lunar phases, planetary alignments; the arrival and departure of distant comets. Excitement, curiosity, frustration, peace, calm, tranquility.

And patience. so much patience! the number of nights I have arrived expecting clear skies to find cloud. equipment failures - when the ASIair wont connect to the camera. When polar alignment just keeps failing for some reason I cannot work out. Two steps forward, five backwards; so often! 

Resilience, patience, consistency, attention to detail, methodicality, organisation, curiosity, determination. Kindness to one's self. 

Expectations vs reality. You are going to learn about your character and develop some emotional skills! 

It is Ok to get a so-so image. All images are hard won successes. Be kind to yourself. learn to walk before you can run and all that! Ignore those perfect social media images. Something to work towards over the long term. Your first photo of the moon; the first comet; that first milky way landscape. It doesn't matter about their quality. Just cherish them. They were milestones on your astrophotography journey; not meant to impress others, but definitely a culmination of your hard won fledgling skills. Personal growth and development! Behind every image you take there will have been new skills learned, patience, planning, troubleshooting, problem solving. We are learning to deal with setbacks, even anticipating them. 

Expectations vs reality. Astrophotography is a slow, complex, challenging and rewarding learning journey. You have to be a willing life-long learner to embark on it. 

Don't forget that you need a supportive community around you if you want to make progress. Online forums, Facebook groups, Astrobin community. Seek feedback and advice. You won't always like it but embrace it. Seek out those who inspire you; who understand what it is like to be a beginner; who value you for starting on the journey they may be further along. Dont be afraid to ask questions - there is genuinely nothing like a dumb question - remember you don't know what you don't know! 

Expectations vs reality. Embrace your social side! 

Curves

Monday, 12 May 2025

What is happening in the night sky during May 2025?

 What’s happening in May?

This is the first time I have done a summary of the monthly night sky and I have drawn from various magazines and websites for this short summary. I am going to try and do this every month from now on, as it helps me plan out what I am aiming to observe. I have done it from a mainly UK perspective. 

DATE:

ASTRONOMICAL EVENT


THROUGHOUT THE MONTH:


Venus: Appears very bright and low in the east in the hour before sunrise all month; shines at magnitude –4.7 and located south of the Great Square of Pegasus, among the stars of western Pisces. Venus extends its elongation from the Sun during the month and is carried eastward against the background stars of Pisces, away from Saturn. A waning crescent Moon stands within 7° of Venus on the 23rd. Venus is best observed in twilight to avoid the dazzling brilliance of the planet when viewed in darkness.

Mars: Easy to find in the west in the first few hours of the night, all month long. Sets around midnight to 1 a.m. local time. Mars will be near the Beehive Cluster (M44) in early May. Two days later, on the 3rd, a waxing crescent Moon joins Mars. Our satellite passes within 2° of the planet, which is now skirting the outer limits of M44. The next evening, Mars is 40′ due north of the centre of the Beehive, a stunning pairing in binoculars or low-power telescope eyepiece. During the rest of May, Mars continues across eastern Cancer and moves into Leo on the 25th. By the 31st, Mars stands 9° northwest of Regulus, Leo’s brightest star. It remains visible until roughly 1 a.m. local daylight time.

It takes Mars nearly two years to revisit the same area of sky, and this May we have the opportunity to see it return to the Beehive Cluster in Cancer. They’ll both appear within the same 10x50 binocular view from around April 21st onwards, but if you return to the pair over consecutive nights, you’ll see the gap between them rapidly close.

Jupiter: Shines brightly in the west following sunset all month. Early in the month it sets about two hours after the Sun, but by late May it's setting only an hour after sunset. Last chance to grab a good view before it drops out of sight for midsummer - the narrowing observing window will provide some interesting events involving the Galilean moons as recompense.

Saturn: Begins the month next to Venus, low in the eastern sky before sunrise. Saturn stands 4° south of Venus on May 1. Both planets are above the horizon by 5 a.m. local daylight time. Saturn shines at magnitude 1.2 and its rings are close to edge-on. Viewing Saturn’s rings is difficult with the low altitude and approaching twilight, but it’s worth a try in the first few days - glimpsing the backlit side of the rings. If seeing conditions allow, might see the gossamer-thin black line of the rings’ shadow on Saturn’s 16″-wide disk. After May 6 — the date of Saturn’s equinox, when the Sun is exactly edge-on to the rings — the shadow essentially disappears. On May 7, the southern face of the rings, tilted by 2° to our line of sight, becomes sunlit for the first time in more than 15 years. Observing these fascinating changes in the rings is challenging, but it’s worth the effort if you have a large telescope and clear eastern horizon. Saturn continues to climb higher in the morning sky and meets with a waning crescent Moon on May 22. By May 31, it’s rising before 3 a.m. local daylight time and stands 15° high in the eastern sky at the onset of morning twilight.

Neptune: also lies in this direction, far beyond both Venus and Saturn, and is difficult to see in early May, when both Venus and Saturn lie about 3° from the more distant world. By the end of May, Neptune stands 1.6° northeast of Saturn and can be spotted with a pair of binoculars, glowing at magnitude 7.8.

Mercury: appears very low in the eastern morning sky in early May, shining at magnitude 0.1. It rises 50 minutes before the Sun on May 1, and only 40 minutes ahead of the Sun by May 12, when the planet has brightened to magnitude –0.5. Its southerly declination makes it a tougher target for Northern Hemisphere observers, whereas those in the Southern Hemisphere have a great view. Spot a gibbous disk growing from 60 percent lit on the 1st to 77 percent lit on the 12th. Mercury quickly dips out of view after the second week of May and reaches superior conjunction with the Sun on May 29. Like its inner Solar System neighbour Venus, Mercury is also currently a morning planet, but positioned too low to really be seen properly from the UK in the dawn twilight.

Uranus: is out of view and is in conjunction with the Sun May 17.

Moon: Throughout May, the Moon will be near Mars and Venus. On May 23rd, the Moon will pass close to both Venus and Saturn, offering a chance to see the three objects together in the morning sky.

2nd

Asteroid Opposition (May 2): Asteroid Vesta will reach opposition on May 2nd, providing an opportunity to spot it with binoculars; will be at its brightest for the year. Can be seen through binoculars under ideal dark sky conditions. It will lie in northern Libra in early May and enters Virgo on May 6th and tracks through Virgo’s far mid-west regions for remainder of month.

5th

Eta Aquariid Meteor Shower (May 5): The Eta Aquariids meteor shower, active throughout April and May, reaches its peak on May 6th, potentially offering up to 50 meteors per hour. The shower is active from April 19 to May 28, and peaks the evening of May 5. The radiant lies near Zeta (ζ)  Aquarii. Need to be early riser or late night owl to see a few meteors.

12th

Full "Flower" Moon (May 12): The full Moon, also known as the Flower Moon, will occur on May 12th. This year, it will also be a micro-moon, meaning it will be slightly farther from Earth than usual.

 Reference sources: 

BBC Sky at Night Magazine May 2025

Astronomy Now magazine May 2025

High Point Scientific Website 

Thursday, 8 May 2025

A spring mission - shooting globular clusters

 Globular clusters, the ancient stellar cities of the universe, formed just after 'The Big Bang'.  I can't remember where I read this but I was instantly hooked!  

They are beautiful objects to photograph and observe. highly packed spherical agglomerations of stars, circular or oval in shape, they can look like spilt sugar on a black cotton table cloth; not that I have been many places where black tablecloths were de-rigours. 

William Herschel used the name 'globular' first - from the latin globulus meaning small sphere apparently. The immense density of stars within globular clusters means that they remain bound together irrespective of whatever gravitational disturbances from the milky way or gaseous drag is occuring in the immediate galactic neighbourhood. This brightness and density means that globular clusters have a high surface brightness and so some can be easily seen through binoculars and small refractor scopes, even during moonlit nights! 

Reading an article in an astronomy magazine recently, (I can't remember which one but it would have been either Astronomy Now or The Sky at Night - the only two I tend to read when I can), that globular clusters can be classified - The Shapley-Sawyer Concentration Class -  a 12 step classification of the relative density of the core. I = high concentration of stars. XII = almost no concentration towards the centre! 

I have been focused in recent weeks on imaging M13 in Hercules. 25,000 light years away, at a magnitude +5.8, if you are in a truly dark site like the Elan Valley, you have a good chance of seeing it with the naked eye on a moonless night. Edmond Halley who discovered it in 1714 said "this is but a little patch, but it shows itself to the naked eye when the sky is serene and the Moon absent". 

How can you find M13? 

M13 sits just outside the largest edge of the keystone asterism in the constellation Hercules.  Use the stars Vega and Arcturus to lead your viewpoint to this keystone star pattern - a large uneven square of four stars, found about a third of the way from Vega to Arcturus.  M13 will be a third of the way along the longest edge of the square between the stars Eta Herculis and Zeta Herculis. 

What equipment have I been using to image M13? 

  • Zenithstar 61ii with field flattener
  • Canon 800D astro-modded DSLR
  • ASIair mini
  • ZWO 120mm mini guide cam
  • RVO 32mm guide scope
  • EQM-35-Pro mount and tripod
  • Celestron Lithium Pro power tank
  • small power bank to power dummy battery for DSLR
What are my 'beginner tips' for shooting globular clusters? 

The great thing about globular clusters are they make decent targets for astrophotography during moonlit nights. We are aiming for the following: 

  • sharp images with pinpoint stars 
  • a good halo of stars around the core
  • no blown out stars or oversaturated ones
  • no blown out core
I did some reading before hand and most tips I found stressed the following. Firstly, and counterintuitively, keep your exposures low. Go for shorter exposures but more of them to get the integration time. Several people recommended bracketing shots at different ISO's first; followed by taking exposures at 10, 15, 20, 25 and 30".  Compare the results and pick what best works for you and your shooting conditions. 

Secondly, pay real attention to your FWHM settings! Yikes - my what? Your Full Width, Half Measure. I had to do some reading around this subject! Essentially, at its simplest, if I understand this correctly (how many caveats can I put in here) - FWHM is to do star focus quality. A star has a bell shaped profile. Using a bahtinov mask and the guiding software of your choice, you are aiming to get your stars as sharp as possible - the lowest FWHM. Basically, the lower the star value - the more focused it is. 
Stressful reading was that! 

So what settings were recommended? Well, how long is a piece of string? 
I've put the settings I used below the two images I have taken thus far and we can do a comparison in a minute.  Many on astrobin, cloudy nights and stargazers lounge (if you haven't come across these forums, look them up because I cannot recommend membership of them too highly for beginners to astronomy and astrophotography - members are so knowledgeable and generous with their advice), suggested starting with 30" and an ISO of 800. Most agreed that in terms of integration time, 45 - 90 minutes would be plenty enough.  many also suggested using a delay between each of your images of around 8 - 12" to allow your sensor to cool. This will help reduce the noise in the final stacked image apparently. 

So, there we are. Some beginner tips for imaging globular clusters. Here are my first images: 


These two images are the same data but processed slightly differently. I'll do another post on how I processed them in SIRIL when I better understand what it is I am doing
The acquisition data for the photos is as follows: 
From my back garden with moon at 35% in a Bortle 4 area
ISO 800, 120" x 30
You can see how that too long an acquisition time has resulted in the core being blown out! 


For my first effort at a globular cluster, I'm quite pleased with these. Not bad, not bad at all but plenty of room for improvement. 

So, what is my post editing workflow for the above images? 

Firstly, I used SIRIL, GraXpert and Affinity Photo. 

My aims: to enhance the colours and contrast; to manage star appearance. 

Here is my workflow. Remember, I am a beginner like many of you and I am still getting to grips with these editing programs. I am using siril version 1.2.6

  1. Stacking of Lights and calibration frames in SIRIL to gain results file
  2. Siril - open results file - select 'histogram' on bottom menu - right click on image and CROP. Save as resultscrop.fits 
Next open this resultscrop.fits file in GraXpert
  1. background extraction (at 15% in bottom menu and smoothing at 1.0 using AI
  2. save as 32 bit fits file  resultscropBge or some such name
Return to SIRIL and open this new image

  1. image processing - star processing - click on cog icon
  2. now click on stars icon - tick amplitude box - enter new values into amplitude boxes (I use 0.1 to 0.7)
  3. click star icon - a list of stars should appear in the dialogue box - keep this box open - drag it to one side
  4. image processing (top menu) - deconvolution - PSF from stars - generate
  5. In the PSF box - the star should be within the box with black space around it - if the star is going outside the box alter the PSF values by increasing them - keep generating and altering the values until the star generated fits within the box with black around it. 
  6. Close the PSF box that you dragged to one side
  7. On remaining dialogue box open (the deconvolution box), experiment with the iterations gradient settings - and when happy - click apply
  8. image processing - colour calibration - PCC
  9. image processing - green noise removal
  10. image processing - star processing - starnet++ removal
  11. load the starmask result image (for globular clusters ignore the starless image that has been generated - we don't need it) 
Move back to GraXpert

  1. open new image - the starmsk image just generated in SIRIL
  2. now complete a denoise (using AI) 
  3. save as 32 bits fits file
Return to SIRIL and open the denoised image

  1. Check that you have image in Linear mode on bottom menu.
  2. image processing - GHS histogram stretch - take the local stretch intensity slider across to max
  3. use mouse to zoom closer into the cluster on the image
  4. now move stretch factor slider on GHS box across to right until stars are just appearing - apply
  5. image processing - GHS histogram stretch 2 - Local intensity stretch slider 2/3rds way across to right - now apply tin amount of stretch slider - zoom into image to look for artifacts in surrounding stars - move slider back to eliminate these - ensure not blowing out the globular cluster core - click apply when happy
  6. you can apply a saturation stretch now - top right hand corner menu on this second GHS histogram dialogue box). Do very tiny adjustments to saturation
  7. save as tiff file if opening in affinity photo 
Now load up the above completed image into affinity photo 
  1. I open the image in camera raw editor and then make subtle edits. be prepared to mask the core so you can work on the background first; and then the reverse, masking the background to work on the core
I hope this helps you get started if you are still getting to grips with SIRIL like me. Let me know if you have better tips for editing globular clusters. Share them in the comment box below so that we can all learn and grow further together.

As always, have fun, stay safe out there and clear skies

Steve 

PS:

Here is my latest GC image - M92

The same image data. The image above is a cropped in version of the image below

Processing data: SIRIL, GraXpert and Affinity Photo - as described above
Capture data: ISO 800, 30" x 120 (One hour integration) and 20 of each calibration frame. 
Moon at 93% full. Bortle 4 skies 
Equipment used: Canon 800D, Zenithstar 61ii, EQM-35-Pro, ASIair mini, ZWO 120mm mini guide cam with RVO F/4 32mm guide scope


Another globular cluster from the constellation Hercules. Magnitude +6.44, it was discovered by Johann Bode in 1777 and was then independently rediscovered and catalogued by Charles Messier in 1781.  26,000 light years away, it is smaller and fainter than its neighbour M13.  Its true diameter is around 100 light years with a luminosity of 150,000 sun's; nothing to worry about but it is approaching us at around 112 km/sec. 

M92 is believed to be exceptionally old, around 14 bn years, almost as old as the Universe itself. It contains around 300,000 stars and the predominant elements within it all are helium and hydrogen. Hence it is a metal poor cluster. 

A fun factoid - here we go - the north celestial pole will come within a degree of M92 in about 14,000 years time.  Every 26,000 years the Earth completes a precession of its axis and during this cycle, the pole moves closer to M92. M92 was last a pole cluster back in 10,000 BC. 

Anyway, back to my processing of the data - its not bad for one hour. I need to sharpen up the images; sharpen up the star edges - I think they are a bit soft. I need to sort out the core as well - its a bit blown out. Perhaps doing some masking to reduce colour saturation of the background as well. 

I know WHAT might need doing. Knowing HOW to do it is an entirely different matter.  It's hard work this post editing malarkey. I may have said this before? 


Saturday, 3 May 2025

Another successful trial night with the EQM35 PRO and the Astro Essentials Right Angled Eyepiece for Polar Scopes

 Why didn't  I  get  one before? 

An Astro Essentials right angle polar scope viewer! Possibly the best invention since sliced bread. Total game changer. From nothing to shooting M13 again in thirty minutes. My fastest set up time ever on anything astrophotography or astronomy related. Well chuffed. I actually completed polar alignment on the ASIair within 2' 05'. A personal best! 

https://www.firstlightoptics.com/adapters/astro-essentials-right-angled-eyepiece-for-polar-scopes.html

Out in the back garden peace is beginning to descend. Traffic noise from the valley below is lessening as midnight approaches. Just a few boy racers with their supped up cars disturbing the nocturnal tranquility.  The distant rumble of the late night London train as it passes through the cutting and under the small road bridge.

As I sit at my garden table, mug of warm  tea alongside my tablet, bats swoop overhead and frogs croak up  by the terrace pond. Distant foxes cry out, a startled pheasant clatters through the woodland shrubbery. I am reassured by the rhythmic click of my camera shutter and the tiny periodic gear clunk from my new new  mount.

A sequence of 60 x 60" shots at ISO 800 on my zenithstar 61ii. The rig is on my lower lawn and I am sat on a bench on the little deck  below it. Beyond up the steep garden  is our little woodland heaven, trees silhouetted against the night sky and its very faint orange light pollution glow. A bortle 4 rural-suburban sky. Arcturus is almost directly above me to the east.

Guiding is good. I'm getting the hang of ASIair management. RA average 0.80. DEC 0.73. I have worked out how to stop the celestron lithium pro power-tank from sliding down the tripod leg.  And the right angled polar scope viewer, combined with my MSM laser pen that attaches to a polar-scope..... game changers. Tonight it took 3 minutes to polar align the mount using the illuminator and a mere three minutes to reconfirm it in the ASIAIR. That alone normally takes me ten minutes. 


£79 for the viewer. Worth every penny! Why didn't I get it right at the start of my astronomy/astrophotography journey? What a muppet eh? 

Thursday, 1 May 2025

EQM-35-Pro mount update

 Go back a blog post or two and you will see that I have inherited the above mount, for free, from a very generous gentleman who was getting out of the hobby. You can read about my initial first efforts using it and the problems I encountered.


Three sessions on, I managed to get it all working last night. Guiding below 1.0. GOTO functioning spot on. Two minute images of M13 - thirty of them, just as a test case; along with calibration frames.  

So, my initial mistakes. Guess who had both an ST-4 cable AND an EQMOD cable plugged in? Only need the one and I opted for the latter. 

Latitude and Longitude inputs in the ASIair slightly out and now corrected!  

Problems with guiding? Down to several factors - too low a gain setting. Wrong aggressiveness inputs in DEC and RA.  Had it on auto rather than either north or south (north proved better for me). 

Polar alignment went better last night. I polar aligned using the little illuminator and the reticle - without the equipment load on. Then after adding the load and counterweight, I did it using the ASIair mini and it was pretty accurate.  I managed to plate solve accurately on Vega and from that point onwards, it would slew to any target accurately and pretty much place it in the centre of my DSLR LED rear view screen. 

Simple things to put right - every night is a learning night if you are a beginner. Good job I'm a 'wing it life-long learner' type 😁

Now all that remains is cable management and also working out how to illuminate the reticule better. The polar illuminator is pathetic. And also how to look through the polarscope without cracking my neck, dislocating my shoulder or wrecking my knees! 

Updates:

In the post today arrived the skywatcher right angled polar scope viewer. Game changer! No more wrecked neck and knees. 

And here is my first ever image of M13 and the first one taken on this new to me mount. 


Shooting data: Zenithstar 61ii with field flattener; Canon 800D. ASIair mini with ZWO 120mm mini guide cam on a RVO 32mm guide scope. Power was a Celestron Lithium Pro PowerTank. 30 x 120" at ISO 800 on a moonless night with 12 each of flat, bias and dark calibration frames. 
Not a bad first! I messed up the core but lesson learned - shorter light exposure times and more of them for stacking. Software used - SIRIL, GraXpert and Affinity Photo. 


Celestron Lithium Power tank review

I have been looking for an additional power tank for my astronomy gear. I did look at various power stations but they were all bigger than I wanted. I need something portable, packable in a small rucksack for when I go off to do milky way photography. 

I ended up going for the Celestron PowerTank Lithium Pro because I got a deal on it and it meets the compactness, lightweightness and versatility criteria. And there were some good reviews out there, with some caveats. 

So what have I ended up with?


A LiFePO4 battery with two USB's - 5V, DC quick charge and fast charge, one of 2.1 A.  A 12v DC 10A car battery adapter port (which should provide consistent power) and a 12V DC 5A telescope power port. There is a LED panel with white or red light illumination. The battery shuts off automatically when insufficient current flow is detected. So there shouldn't be accidental battery drain. I immediately like the nifty 2" strap that helps secure the unit to a tripod leg and I suspect I'll use the red light to illuminate the ground so I dont keep bumping into the tripod legs in the dark! And I can definitely confirm it is lightweight relative to its size - so bonus! 

The PowerTank holds up to 2000 charge cycles, has an un-recharged shelf life up to 10 years and should go for up to 17 hours. LiFePO4 batteries tend to be safer and less prone to chemical fires or leaks than traditional lead-acid and other lithium based batteries. Tough plastic exterior, charging time of six hours (more about that later). It comes with a universal plug 100-240v AC charger. 

Other things?  Battery capacity is 158.74 Wh; charging input 16VDC@ 2000mA. The telescope power port is 12VDC @5000 mA, tip positive. The car battery adapter port is 12VDC @10A, tip positive. USB charging port 1 output is 5VDC@2100mA whilst the second usb port is 5VDC quick charge.  

Celestron information suggests that the auto shutoff threshold current is  car battery port - Less than 420mA for a long period of time. 

The PowerTank has a weatherproof/dustproof rating - IP-65.  The tank comes with a 2m long telescope power cord for celestron telescopes. 

Finally, product dimensions? 8.75" x 6" x 4" which in my head as a European - around 22cm x 15cm x 10cm. Weight is 4.5 lbs - which at a push in my head is 2 kg's just a tad over! 

So, I'm looking forward to using this, having read positive reviews. 


So, having used it three times, how is it doing? 
Not good to be honest - I'm mildly 'initially disappointed' given its cost! 

I used the little 12v port on one side to power the mount and the cigarette socket to power the ASIair and guidecam. I plugged my DSLR dummy battery into one of the USB slots. 

The good: 
1. It is very compact and lightweight
2. Over three different nights - it powered everything with no problem - DSLR, ASIair mini, ZWO 120mm mini guide cam, EQM 35Pro mount. Four hours on each of those nights. 
3. It will strap to a tripod leg - with some adapting - see below 


The bad:
1. plastic lid - it snapped off on the second night. The two lug hinges holding it in place are poorly designed. I didn't manhandle it in anyway, no excessive force. The lid just snapped off the lugs when I lifted it up. Subsequent internet browsing shows some reviewers complaining about this!  The lugs disappeared down their holes. The lid snapped on the second night - how ridiculous! 
2. charging times - yes it takes 6 hours, but! Mine just doesn't seem to hold its charge. Even after six hours and all red lights show battery full, if I come back three hours later - its down to three lights and needs charging back up to get all four red lights. I am disappointed. I am switching it off correctly. It is baffling and immensely irritating. Maybe I have missed something in the handbook but I've been through it twice. Do I have a fully charged battery? 75% charged? What is it - does it automatically drop to three lights as soon as you switch it on? Silly design flaw if it is! 
3. Insufficient power for DSLR camera. This is an interesting one - I use a dummy battery on my Canon 800D and when I plugged it into the USB slot on the powertank, it did power the camera but I lost the rear screen touch screen function. Just wouldn't do it at all. Use a small powerbank and all was fine. Return to using the powertank and immediate lost camera screen touch function. Back to little powerbank and back it came. Baffling but definitely related to the Celestron Powertank in some way but no idea how or why. It may be something I'm doing in fairness.  

The ugly: 
3. attaching it to the tripod leg with the Velcro strap. My experience? For three consecutive nights, all it has done is slide down the tripod leg. Useless! It doesn't matter how tight you do it, there is insufficient grip in the V groove to secure it and the velcro strap is just too long for a 1.75" tripod leg. I am having to use a separate little long velcro cable tidy to support the weight of the powertank via the eyepiece holder which braces the tripod legs. Irritating! 
4. the LED lights are very bright. Even the red light is bright and whilst I can see its superb usefulness in an emergency, for astronomy, it does see somewhat counter-intuitive, but that could just be me I guess. It certainly lights up the tripod legs though! 

I am torn between contacting the dealer I got it from, contacting Celestron to get answers to my doubts and just sticking with it and giving it a longer testing time, so that at least I am fair in this review. Let's just leave it at 'initial impressions are mixed'! 

But the fact that the lid broke under barely any pressure and the fact that it never seems to reach a full charge that actually holds - seem to be major issues to me! 

I'll let you know how I get on. Out of fairness, I feel the need to give it further testing. 

Video reviews: